Remote support
Sometimes a technical situation calls for a consultant on site to make physical installations, plug things in, or simply to be able to assess the issue face-to-face. When that’s not possible, or if you don’t need on site help, remote screen sharing is my tool of choice. A remote session allows me to see your screen, as well as temporarily take control of your computer.
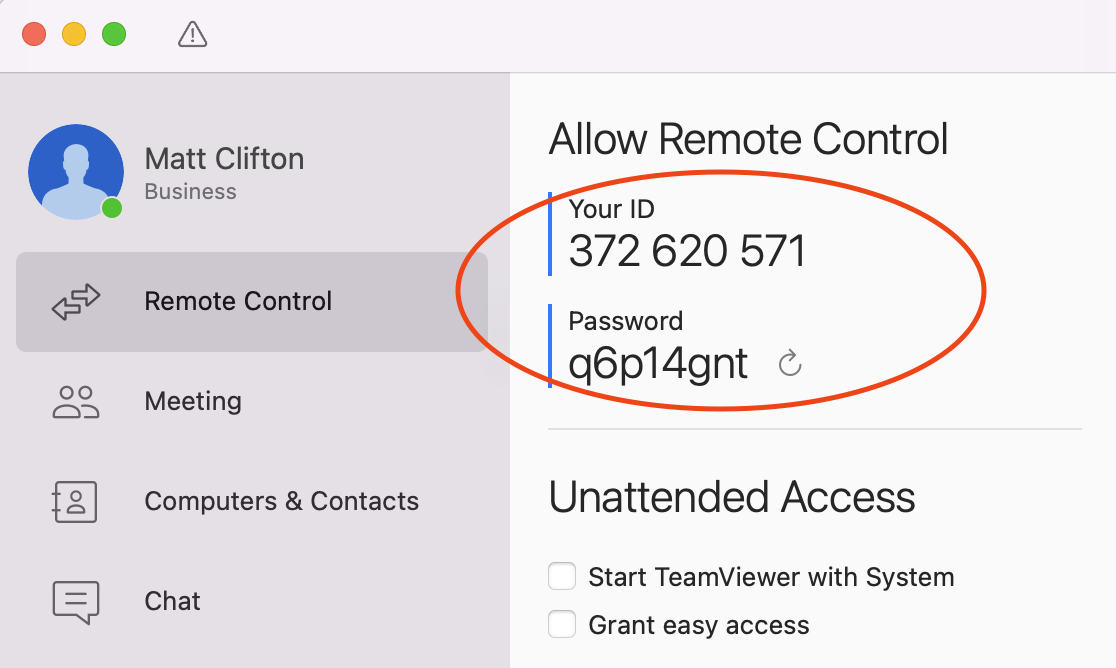
The application I use is called Teamviewer. Once you install and run it, you’ll get an ID number and a one-time passcode. You give those to me over the phone or via text, and I will be able to connect to you. Once you quit out of the application, the connection is closed, and the passcode is no longer valid. The next time you launch Teamviewer, you’ll get a brand new passcode.
If we connect on a regular basis, as soon as you launch Teamviewer, I will send a prompt to your computer to request a connection.
The system is fast, secure, and free for you to use. It doesn’t run in the background and so there’s no risk that someone else can take over your computer without your knowledge or permission.
Here’s how to set up the screensharing connection.
1. Download Teamviewer from the link below.
Look for a button labelled “Download” or “Free download”. The correct version for your computer should automatically download. You may need to click “Allow website to download file to my computer” if you see that prompt.
2. Open the downloaded file (from your Downloads folder) and run the enclosed installer.
You will need to enter your computer password to authorize the installation. Accept all default installation options. Teamviewer may quit and reopen and ask you whether you want to install for personal or business. Choose Personal. You should eventually see a window containing “Allow remote control” with an ID and password.
3. Set up permissions
On a Mac, you will probably need to allow Teamviewer to transmit your screen to me and allow mouse control. On first launch, Teamviewer should prompt you to do this with a window that contains three red dots and “Request Access” buttons. Click the top “Request Access” button, click “Open System Preferences“, then unlock the preferences window with the padlock at the lower left corner and your computer password.
In the left hand list, scroll down to “Screen recording” and select it. On the right, check the box next to “Teamviewer”. This allows me to see your screen while we’re connected.
In the next window (“Teamviewer will have to quit and reopen”), click “Later”.
Scroll in the left list to “Accessibility”, select it and again check the box next to Teamviewer. This allows me to move your mouse pointer around on the screen while we’re connected.
You do not need to enable any permissions for full disk access, camera, or microphone.
You have now set up the correct permissions and we’re ready to connect!
It’s usually easier if you can text me the Teamviewer ID and password, so as not to transmit errors via phone. I’ll see you soon!

The Teamviewer window will look like this – you’ll need to give me your ID and password.
